Cable disc brakes work well in all conditions. Even so, check the brake cables regularly for signs of fraying and keep them well lubricated. If the brakes do not release quickly when you let go of the brake lever, they need lubricating. Check brake travel, too, since excessive travel can mean that the brake pads are worn.
When you examine old brake pads, look at the way they are wearing. If they have developed a ridge, or the wear is in any way uneven, the caliper may need to be realigned.
When lubricating your bike, make sure that the lubricant does not fall on or touch the brake discs or pads. Do not even touch the disc or pad faces, because the grease from your fingers can easily affect their performance. Always clean the discs with denatured alcohol.
Tools Needed:
- Allen key multi-tool
- Needle-nose pliers
- Cable pullers (optional)
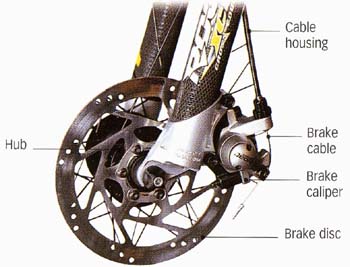
Parts of a Cable disc brake (front)
Cable housing; Brake cable; Brake caliper; Brake disc; Hub
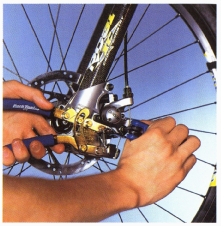
Adjusting cable travel
1. Loosen the cable-clamp bolt on the caliper and pull through enough cable, with pliers or a cable-pulling tool, to take up any slack in the cable.
Tighten the clamp bolt. This will reduce the travel on the brakes and is a necessary adjustment if the brake levers need to be pulled a long way before the brakes work.
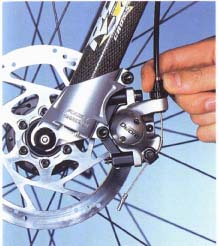
2. Screw out the barrel adjuster to reduce brake travel. The adjuster is just above where the cable housing sits on the caliper body.
- Loosen the fixing clamp to remove the old cable if a new cable is needed. Insert the new cable into the brake lever and follow Steps 1 and 2 with the new cable.
- Lubricate the new cable before you fit it.
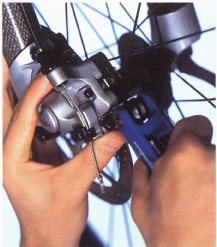
3. Align the calipers with the discs using the adjustment bolts. Undo these bolts, align the caliper so that its sides are parallel with the disc, and then tighten.
- Align brakes that are not equipped with this adjustment facility by using spacers to pack out the caliper-fixing bolts.
Replacing pads
1. Replace the pads if the brakes are still not working effectively or if they are worn.
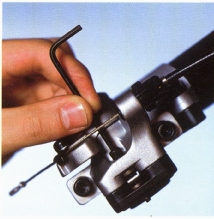
- Remove the spring clip with needle-nose pliers and loosen the pad-retaining bolt that holds them in the caliper. Take care not to damage the clips. The pads should now drop out.
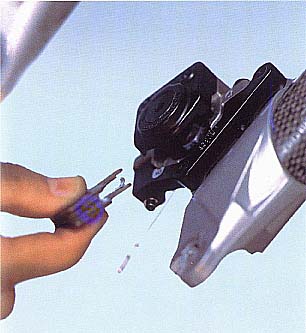
2. Insert the new brake pads and secure them with the Allen bolt and the spring clip.
- Clean your hands before handling brake pads because grease reduces the pads’ ability to operate.
- Choose replacement pads that are specific to the manufacturer of the brakes on the bike. Pads made from different compounds might be worth investigating if you want to alter the performance of your brakes.