Cantilever brakes work with the brake levers that fit dropped handlebars, whereas V-brakes do not. This is why touring and cyclo-cross bikes are fitted with cantilevers. Cantilevers were the predecessors of V-brakes, so they may also be fitted to older mountain and hybrid bikes.
Keep cantilever brakes running smoothly by regularly checking the pads for wear and adjusting the pad alignment and brake travel.
The cable of the cantilever brake shown in these steps is clamped to one brake arm and the straddle wire running off it attaches to the other arm. On some older cantilever brakes, the brake cable is attached to a straddle. This hooks the straddle wire that transfers the cable’s pull to both brake arms and needs regular adjustment (see Step 1 Adjusting a BMX U-brake).
Tools needed:
-
5mm Allen key
-
Grease gun (optional)
-
Grease
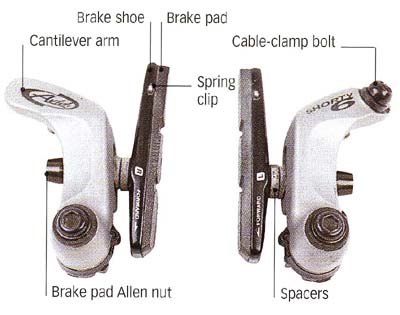
Parts of a Cantilever
Image (right) shows:
Brake shoe and pad; cantilever arm; Spring Clip; Spacers.
Adjusting a cantilever brake
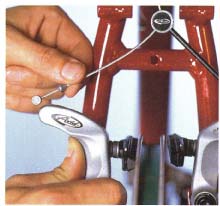
1. Disconnect the straddle wire by pushing the cantilever arm to which it is attached toward the wheel with one hand. At the same time, unhook the nipple on the straddle with the other hand.
- Undo the pivot bolts that attach the cantilever arms to the frame bosses.
- Remove the cantilever arms.
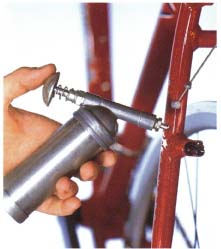
2. Clean the exposed frame bosses with a cloth soaked in degreaser, then lubricate with a light grease, not a heavy-duty industrial grease. Use a grease gun if you have one.
- Bolt both arms back on to the bosses, making sure that the stopper pins arc inserted into the same hole on each boss.
- Replace the pivot bolts and then tighten them to hold the brake arms to the bosses.
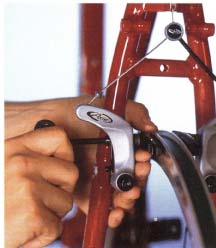
3 . Check the pads. If one is worn or badly aligned, undo the pad-fixing bolt with an Allen key and remove the pad/shoe assembly.
- Remove the spring clip from the brake shoe and slide out the worn pad. Slide in a new pad and replace the spring clip.
- Return the assembly to the brake arm, line up the pad so that its entire surface contacts the rim and is parallel with it, then tighten the bolt.
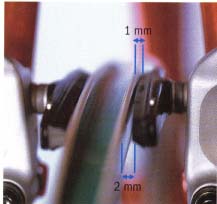
4. Angle the pads so that the front of each pad hits the rim before the rear when the brakes are applied—this is called “toe in.”
Loosen the pad-fixing bolt and place an emery board between the rear of the pad and the rim. Apply the brakes and then tighten the bolt. Release the brakes and remove the emery board. Ideally, the front of the pad should be 1mm from the rim and the rear 2mm.
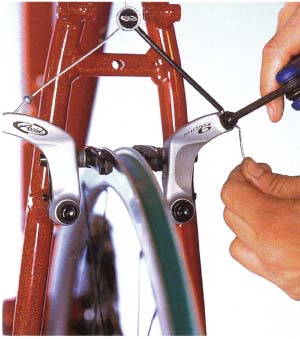
5. Undo the brake-cable clamp to achieve the proper spacing from the pad to the rim.
- Pull the cable through the clamp until the front of each brake pad is 1mm from the rim. Tighten the clamp bolt.
- Pull the brake lever to see if both brake arms contact the rim simultaneously. If they do not, screw the centering screws in or out on each arm until they do.