Hydraulic disc brakes are more powerful than cable disc brakes, and once correctly installed, will require less maintenance. A bike that has disc-brake mountings on the frame and fork will be suitable for a disc- brake system.
Cable disc brakes can work with rim-brake levers but their performance falls fractionally short of hydraulic systems. These work by compressing a fluid rather than pulling a cable. Compatible hydraulic brake levers will need to be fitted to the handlebar and brake hoses that hold the brake fluid. Disc-specific hubs will also be required.
There is no need to fasten the front hose to the fork. To direct and keep the rear hose in place, use an adapter kit to let the frame’s cable guides take hoses, because the cable hole in a standard cable guide is too small.
Tools Needed:
-
Allen key multi-tool
-
Wrench
-
Thread-locking compound
-
Utility Knife
-
Flat Screwdriver
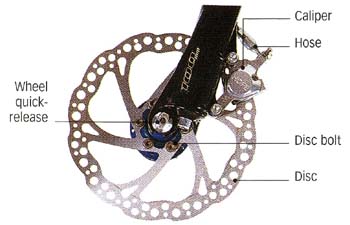
Parts of a hydraulic disc brake
wheel quick-release; caliper; hose; disc bolt; disc
Installing a hydraulic disc-brake system
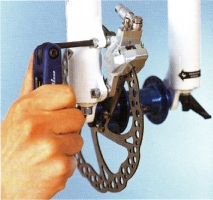
1. Fit the caliper using the Allen bolts and washers provided.
- Switch the washers around to pack out each caliper in order to line it
up with the disc.
- Apply a thread-locking compound to the threads, then fix the disc to the hub using the disc bolts.
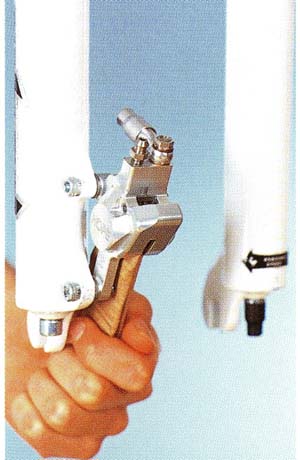
2. Cut the hose of the hydraulic system if it is too long by following Steps 3-7.
- Take out the brake pads first and replace them with a spacer. The caliper used here is a demonstration model with no hose attached.
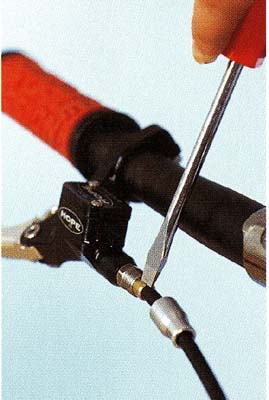
3. Mount the brake lever onto the handlebar and secure with the clamp bolts.
Unscrew the aluminum shroud located where the hose joins the brake lever and move it out of the way. Pry open the brass olive beneath with a flat screwdriver.
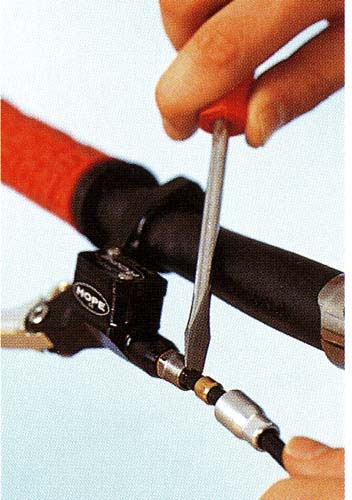
4. Move the brass olive along the hose and out of the way.
- Pry the hose off the brake lever joint with a flat screwdriver, but be careful not to damage the lever joint. At the same time, gently pull on the hose to detach it.
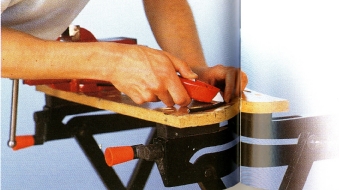
5. Carefully cut off excess cable from the detached end of the hose with a sharp knife. Keep the olive and the shroud on the part of the hose that you will be reconnecting.
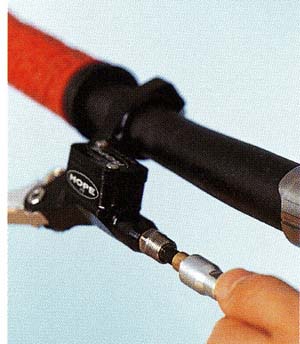
6. Join the hose to the brake lever by inserting it into the lever joint. Push it home firmly, but not too hard, since this can split the hose.
- Hold the hose upward as you work to keep brake fluid loss to a minimum.
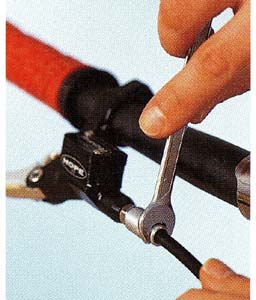
7. Squeeze the olive on to the hose at the lever joint to make a good seal.
- Screw the shroud on to the thread of the lever joint.
- Bleed the disc-brake system.