All brake cables wear out, no matter how much time is spent maintaining them. Cables for roller brakes—sometimes called drum brakes—are no different. If the bike is equipped with roller brakes, the steps in this sequence show how to replace a cable when it is frayed or worn out. However, lubricating the brakes and replacing the internal parts are occasional jobs that are best left to the experts at a good bike shop.
If the rear inner tube is punctured, or it is necessary to take off the back tire to replace it, you need to know how to disconnect the rear brake in order to remove the back wheel. At the same time, you should know how to reconnect and adjust the brake after replacing the wheel. Once this is a familiar routine, it will also be possible to adjust the roller brakes for brake pad wear from time to time.
Tools Needed:
-
Wrenches
-
Needle-nose pliers
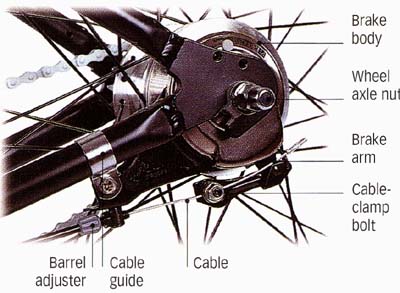
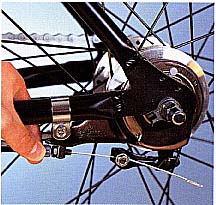
Parts of a roller brake
Brake body; Wheel axle nut; Brake arm; cable clamp bolt; Barrel adjuster
Replacing a roller-brake cable
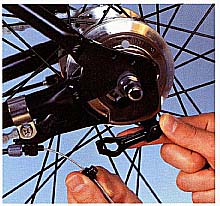
1. Push the brake-arm cradle toward the front of the bike. This takes the tension from the cable so that you can unhook the cable-clamp bolt from the cradle and remove the old cable.
- Screw the barrel adjuster on the brake arm in or out to about half of its extent.
- Remove the wheel at this point if you need to replace the tire or inner tube.
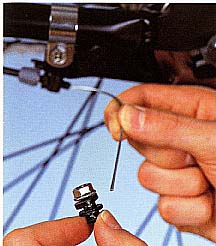
2. Thread the greased cable through the brake lever, then through the housing.
- Dribble a little oil into the housing.
- Make sure the housing is firmly located in the lever, then thread the cable through the barrel adjuster and seat the housing firmly into it.
- Thread the cable through the cable-clamp bolt.

3. Pull the cable backward with the needle- nose pliers while you push the brake-arm cradle forward and hook the clamp bolt into it.
Bend the cable slightly behind the clamp bolt and ask someone to push the brake-arm cradle forward. Use your free hand to tighten up the bolt so the cable is nipped in place.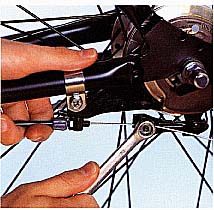
4. Tighten the cable-clamp bolt while squeezing the cable slightly, as your helper keeps up the forward pull on the brake-arm cradle.
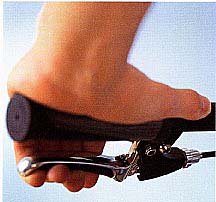
5. Pull the brake lever hard repeatedly (ten times) to bed in the brakes. The brakes may be a little tight, as if they are being applied gently, even when there is no pressure on the lever.
- Keep about 2 (15mm) of play in the brake lever before the brakes begin to bite.
6. Screw in the barrel adjuster a few turns until you achieve the 2/5 inch (15mm) of play in the brake lever.
- Pull in the lever after each turn in the adjuster to check when the brakes begin to bite.