Arizona pix | California pix | Toledo Botanical
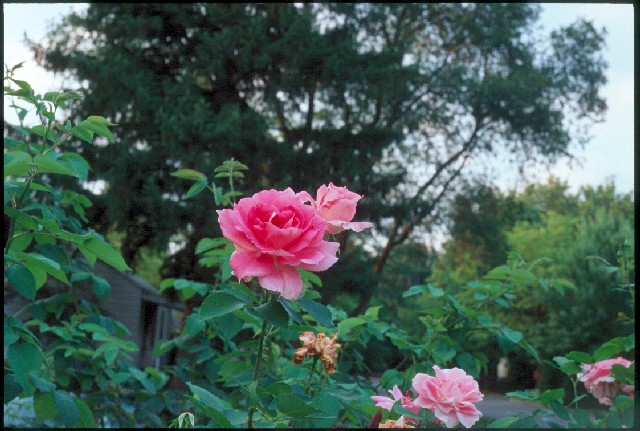
above: Hybrid Tea Rose at Toledo Botanical Gardens
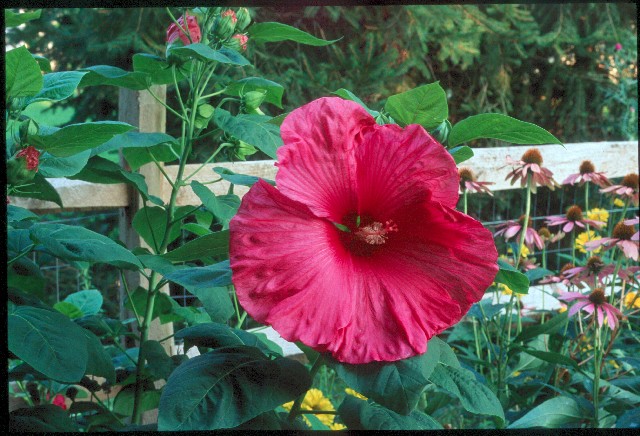
above: Hibiscus in our garden
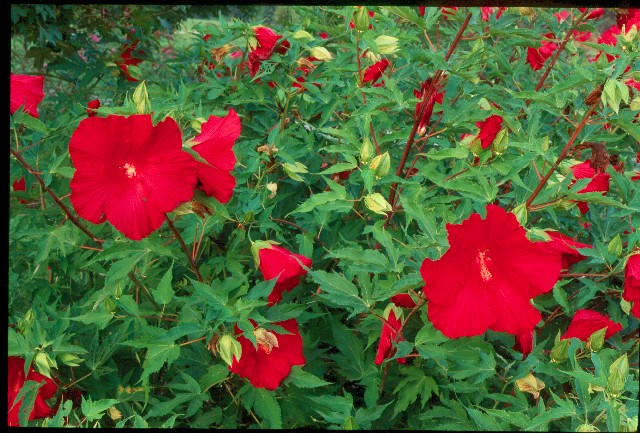
above: More Hibiscus at Toledo Botanical Gardens. Notice over-saturated, "bleeding" reds. This is the partly the result of the film and/or laboratory processing. This image was scanned in in mid 2000 and then resized for Internet use using Adobe Photoshop (a version from 2000).
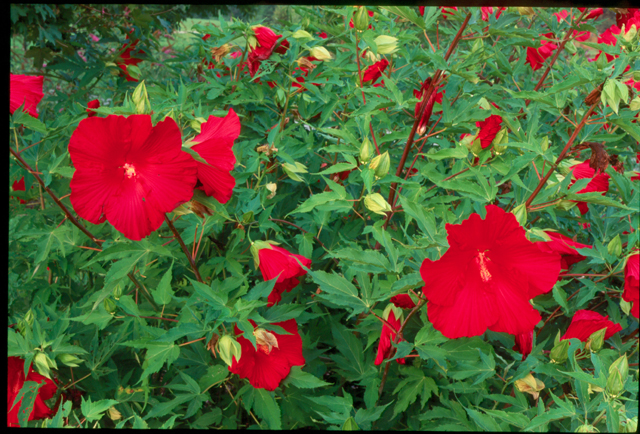
above:
The same image as above, but resized from the originally scanned (raw
file) using a 2003 version of Adobe
Photoshop Elements. Elements saved the image as a much bigger;
hence, note the improvement in red saturation and overall image smoothness.
Software manipulation and evolution is an important factor
in image-quality improvements.
Part One: Equipment: camera, meter, flash, tripod
This article is a simplified photography course directed at new photographers out there who want to know where to start.
If you really want to learn photography the first thing you need is
a good affordable and reliable camera. It must, and I repeat must, be
able to shoot in fully manual and fully auto focus modes. (This leaves
out any digital cameras on the market right now, sorry.) To really learn
photography you must understand the equipment. You'll need to learn
how manipulating the shutter speed, aperture, and focus will have a
dramatic effect on your photos. Meters, if you have a camera that can
work in a fully manual mode it should have an internal meter suitable
for what you will be doing. Tripod, you're going to need one whether
it's portrait work or landscapes you'll need one eventually. Luckily
you don't have to spend a lot here. Just something lightweight and durable.
Flash, you can buy a separate camera mounted flash, which is great if
you can afford it. Consider what kind of photography that you will be
doing though. If you're going to do mostly nature and landscape, you
may only need the fill flash that comes with most cameras today. If
you plan on doing portraiture alone you will want to consider a camera
mounted flash that has an adjustable angle. Film, film speed to be exact.
Slower speeds (25 to 400) are intended for portraiture and landscape
photography. Faster speeds (600 and above) are intended for actions
shots and photojournalism. So first you need to know what you going
out to photograph and make sure that you have the appropriate film for
the job. Now that you have the camera loaded with film consider shutter
speed. Do you want to blur motion, or freeze it? If there is no motion
at all what shutter speed do you need to expose the scene with natural
light. From 1/60th and down to the bulb setting will blur most motion.
For example if you want to blur the water in a waterfall, a setting
of 1/30th should work. (You'll need a tripod though.) 1/125th is a normal
setting for most shots. On many cameras the 125th setting is marked
in a different color to make it obvious. If you want to freeze action
you'll need to start with 1/500th and work up from there. The faster
the motion the faster the shutter speed needed to stop motion. Many
cameras go up to 1/2000th of a second. If you're trying to use natural
light alone in a scene you will want to determine the aperture first
and then see what shutter speed you need to properly expose the scene
for available light. (Keep in mind sometimes there isn't enough light.)
Aperture, these are the set of numbers on your lens closest to the body
of the camera. They can go from 1.8 to 22, and they are referred to
as F-stops. These numbers determine how much light reaches the film
inside of your camera. Most internal meters will blink on the appropriate
aperture for the shutter speed that you've set, or the speed you've
set will blink if your F-stop is correct for the speed. Both the F-stop
and shutter speed can be changed to expose the scene correctly. Consider
that the faster the shutter speed the more light will be needed to expose
the scene correctly. This makes logical sense if you think about it.
If the shutter isn't open as long, fast shutter speed, then there is
less light able to make it to the film and so the scene must be brighter
to expose correctly. To learn, bracket your shots. Take the first shot
at the aperture suggested by your meter, move one stop up, take a photo,
one down, take another photo.
Flash, I personally like shooting with natural light whenever possible
and at most I use a fill flash. But if you're going to do portrait work
then most of the time you may be indoors and you will need a flash sometimes.
For the amateur the fill flash units that are on the top of most of
today's cameras are wonderful for basic work. You will have to read
your manual on your particular flash unit to learn what it can and can't
do. This is where the camera that is fully manual and fully auto is
great for the amateur. You can usually set it so that the camera will
meter and set the flash output accordingly and then you still can control
the shutter speed and aperture.
This week's assignment: Have several rolls of 400 speed film, find a
subject that you can work with preferably something that won't move,
and shoot one roll of film. Shoot some of the roll in the morning, afternoon,
and evening. Bracket every shot, take notes on time of day and light
conditions, and what your settings (aperture) were for each frame, keep
the film speed the same for the entire roll. Have the film developed
and examine the photos. You should be able to see a difference in each
frame. You'll need to repeat this procedure until you feel that you
understand the relationship between shutter speed and aperture, and
every camera and meter has it's own quirks and differences, you're camera
will act differently than someone else's. This way you will learn you
own particular camera as well. Once you have a sense of how aperture
works you won't need to bracket every shot you take, you may only need
to do it in cases where you want to be extra safe on exposing the subject
correctly. (top of page)
Now that you are beginning to understand how your camera works you
can begin to understand basic composition. I know that many people that
I’ve talked to think that photography is just pointing your camera
and taking a photo but it’s more than that. After you understand
how your equipment works you can begin to get into the real art of photography
and that art is called composition.
Basic principles:
1. Use all of your available space. Fill the image with the image. If
the reason that your taking the photo is your daughter’s beautiful
face then get closer. If you’re taking an image of the breathtaking
valley before you. Fill the frame with the valley. Keep distractions
out of the frame. They’re called distractions for a reason.
2. Look at the forms in your image. You almost have to look at the people
or the landscape before you in their simplistic geographic forms. A
good way to learn form is to practice taking photos of still life objects,
that you can arrange into pleasing forms. A good photo is always a beautiful
arrangement of form. Whether it’s the beauty of a woman’s
face, her features being forms, or a wonderful landscape, trees, rocks,
and hills being forms.
3. Line or direction, motion. The direction of the forms in your photos
is very important. Never have action or motion moving outside of your
image. It will direct the eye away from your image. Diagonal motion
lines are good, curves and “s” curves are better. The last
two is probably way landscape photography is so popular nature is full
of curves. Also never put a horizon line in the center of your frame.
4. Contrast, the difference between black and white. Now it is possible
to have a beautiful photo with little contrast if that is your intention,
this works best with color. But a lot of shots, some really beautiful
shots have a nice balance of black, white, and grays. This can be manipulated
for artistic purpose of course, but in the beginning you want to focus
on trying to take shots with equal amounts of black, white, and shades
of gray. (Shoot a roll of B&W film to really learn this principle.)
5. Color, you may have to familiarize yourself with the color wheel.
(See my article Graphic Design Using Color for more information it’s
for graphic design but the first couple of paragraphs talk about basic
color theory) Whether you’re shooting nature or setting up your
own shots in a studio you need to know what colors go together and why.
Many of us have an instinct as to what looks good. When in doubt follow
your instincts. Start out by taking shots of things that you think have
pretty or beautiful colors. Show the photos to others and see if they
agree. Photographers learn not only what they think is beautiful but
what is universally beautiful as well.
Now the hard part practice all these principles at the same time. It’s
not easy! Now you really know why photographers take years to really
learn their craft.
This week’s assignment: Let’s break this down into four
assignments. You’ll need four rolls of film. Roll one, fill your
available space. Shoot pictures of whatever you like, but get closer.
Eliminate distractions from your image. Keep the focus of your image
on whatever it was that made you want to take that photo. Roll two,
forms. Here’s an old stand by that I did in college. Get out an
assortment of vegtables and fruit from your kitchen. Put a sheet down
on your table, no distractions, shoot an entire roll of the veggies
and fruit making sure that your rearrange with each shot. Make sure
you study your results and see which forms looked best. Roll three,
Contrast, you can do this in B&W film if you want to. Take a shot
of the flower in your garden in the early morning, afternoon, and sunset.
Shoot some portraits at the same times, by candlelight too. When you
see the results you will be surprised. Roll four, color. Use the vegtables
again, this time paying attention to the colors. If you can tell me
why a red tomato looks best on a green bed of lettuce or the orange
sunset with the purple clouds is so captivating then you’ve figured
out some of color theory. (top of page)
Even if you feel that you already know what kind of photography you
like to do, it’s always a good idea to try your talent at different
aspects of photography.
Pictorial, this is a general term but it applies to any photographer
who’s goal is simply to create beautiful photos. This breaks down
into smaller subsets but the most popular form is landscape and nature
photography. This is what I do and it’s tempting to go on and
on but I will just say that this form of photography, to me, is a real
art. At least that is goal to create art in photographic form. It is
the goal of the photographer to use their abilities to capture an image
in it’s moment of beauty and simplicity.
Portrait, this can be people and even animals. It also includes wedding
photography as well. This is an aspect of photography that can be a
lot harder than it seems. Not only do you have to know your basic photo
composition but you need to understand what makes each person look their
best. You must know how to bring out their personality and character
in the shot. If you love working with people this may be your field.
It’s fun and challenging.
Photojournalism, now this isn’t just press photography, though
that is one aspect of it. It is also documentary photography as well,
the latter doesn’t always need an event to occur right in front
of you. Either way the purpose is to tell a story. Really good photojournalism
shouldn’t need the text below it to tell you what is going on.
It should be compelling and storytelling. Composition still plays a
part, you can’t tell a story if the story can’t be seen.
And while these photos can be beautiful in their technical aspects they
aren’t necessarily beautiful images. The story telling is as important.
Abstract, probably not as common of a form of photography but I’m
seeing it more and more. This is usually characterized by extreme close
ups of detail of something, so much so that you can’t identify
the original subject. But in this case that doesn’t matter since
the abstract detail or pattern is the subject of the photo. (Color can
also be the subject as well.) Basic composition still plays a part,
maybe a bigger part in this form of photography.
This week’s assignment: Four rolls of film again. Roll one, pictorial,
get outside and try your best using all your abilities to capture moments
of beauty and simplicity. Composition is key here. Roll two, portrait,
get somebody to volunteer for you. Remember composition but really focus
on finding the shots that make that person look their best. Different
light, background, camera angles, or even clothes. Roll three, photojournalism,
outside or inside anywhere you see stories. This can be as simple as
a child playing with their toys. Find the appropriate moment to take
a shot that tells the story. Roll four, abstract, details, details,
and more details. Get in close, make sure that you can’t identify
the subject but find beauty in the color or details of the item.
Home > Photography: Introduction | Mistakes
and Corrections | Color
Photography | Scanner
Photography | Astronomy
photos
Arizona
pix | California
pix | Toledo
Botanical