Brake cables on a drop handlebar need to be changed at regular intervals, although this depends on how much the road bike is used. For a heavily used bike, change the brake cables every two months; for a bike ridden lightly two or three times a week, change the brake cables once a year.
The steps in this sequence are performed on the back brake. Replacing a cable on the front brake follows the same principles, but there are no cable guides to thread through.
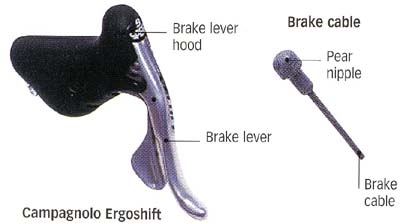
Brake levers that fit a drop handlebar require a brake cable with a pear nipple. Always keep a new cable in the toolbox or workshop as a spare. A rear cable can be cut to fit the front as well. Once the cable has been removed, remember to put a few drops of lubricant on the pivots around which the brake lever moves, and spray some oil into the tube inside the lever hood where the cable is inserted.
Tools needed:
- Needle-nose pliers
- Cable cutters
- Allen key multi-tool
- Fine round file
Parts of a Brake Lever and a Brake Cable
Image (right) shows:
Brake lever hood, Brake cable, Pear nipple, Brake cable, Brake lever, Barrel adjuster
Replacing road bike brake cables
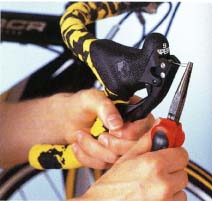
1. Loosen the cable-clamp bolt on the brake caliper. Remove the old cable by pulling its nipple from the lever hood with needle—nose pliers.
- Note exactly where the cable fits in the lever hood to allow you to fit the new one easily.
- Remove the part of the cable that is still clamped to the caliper if the cable you are replacing is broken.
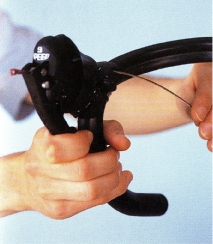
2. Insert the new, greased cable into the cradle on the lever in which the nipple sits.
- Thread the cable into the tube in the lever hood. Push it in and watch for it to come out of the back of the lever hood. Now pull it through the lever hood from behind.
- Make sure that the nipple is seated in the brake lever cradle when the cable is all the way through.
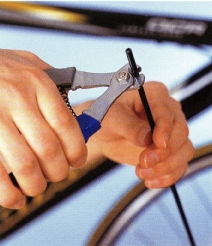
3. Cut the new cable housing to length with good-quality cable cutters. Measure the old housing and cut the new one to the same length.
- Always cut between the spirals of the housing.
- Dribble oil into the housing, holding it while the oil runs down to coat the inside.
- Renew cable housings at regular intervals.
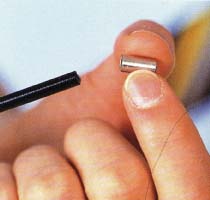
4. Fit each length of cable housing with a metal ferrule at both ends. When you apply the brake, ferrules prevent the cable housings from being pulled through the cable guides on the frame.
- Make sure that each ferrule is pushed all the way on. Put a little oil on the end of the ferrule to help it slide into place, and wipe off any excess.
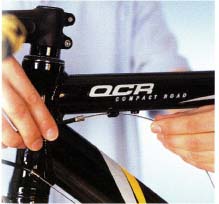
5. Thread the cable through the first length of cable housing and the first cable guide.
- Pull the cable all the way through and insert it into the next guide, then the next housing.
- Push the cable housings firmly into the guides to ensure there is no slack when applying the brakes.
- Use a fine round file to file out any tight cable guides. Do not file more than you have to.
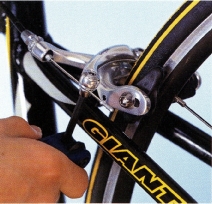
6. Pull the cable through the cable-clamp bolt on the caliper until each brake pad is about 2mm from the wheel rim.
- Hold the cable and tighten the clamp bolt.
- If the brakes have a quick release, make sure that it is in the closed position before you tighten the clamp bolt. Shimano quick releases are on the caliper and Campagnolo quick releases on the lever.