Tools needed:
- Plastic mallet
- Vise
- Drifts (suitable for brand of hub—check manufacturer’s instructions)
- Allen key multi-tool (optional)
Cartridge hubs offer many of the advantages of cartridge-bearing bottom brackets—for example, they keep out water and dirt, increasing the life of the bearing. However, unlike many cartridge bottom brackets, you can change bearings when they wear out. Replacing the bearings is a straightforward task that requires special drifts to drive out the old bearings and drive in the new.
Check the bearings by removing the wheel from the bike and spinning it while holding the axle. If you feel any roughness, the bearings are worn. Excessive play of the hub on the axle is also a sign of wear.
Only the hub is shown in these steps, but you will deal with the whole wheel. You can also follow these steps to replace a bent or broken axle—although rare, it can happen if a bike hits a bump in the road and the cyclist is not prepared for it, or when landing jumps on a mountain bike or a BMX.
Looking for the latest gear? Visit our new Cycling Gear and Accessories site.
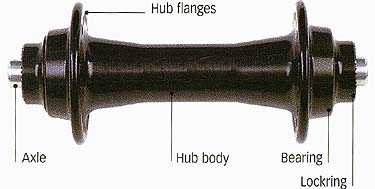
Right: Components of a front cartridge hub.
Axle, Hub body, Bearing Lockring
Step-by-step guide to Overhauling a cartridge hub
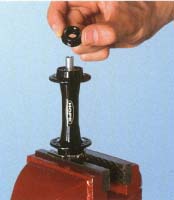
1. Remove the seals from each side of the hub axle. Some seals are retained by a lockring that is secured with a grub screw; others just require prying off.
- Remember how they look in situ and where they fit because you will need to put them back in exactly the same position.
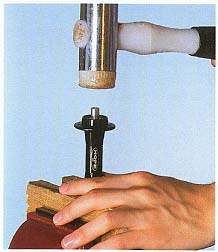
2. Rest the hub flange between two blocks of wood held in a vise.
- Tap the axle down with a plastic mallet. Be confident when using the mallet, since you may have to be forceful.
- Drive the axle through the upper bearing with a drift. This is a metal cylinder with the same diameter as the center of the cartridge bearing.
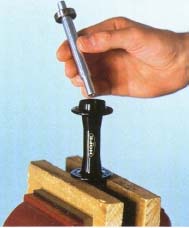
3. Take out the axle from the hub body with a bearing still attached to it.
- Lay this bearing on the wooden blocks and drive the axle through.
- Drift the other bearing out of the hub body, as in Step 2. Do this from behind the bearing, by tapping the drift from the same side of the hub from which you removed the axle.
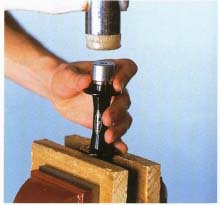
4. Insert the first new cartridge bearing by holding the bearing square to the hub and driving it home with a wider drift.
• Knock the bearings in gently. Although it can sometimes take a bit of force to knock the old bearings out, it should not take too much force to position the new ones.
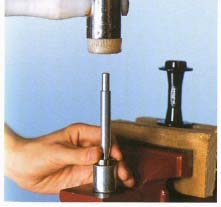
5. Push the second bearing onto the axle , then place the drift on a flat surface, such as the flat portion of the vise. If you are not using a vise, place a piece of thick metal on the work surface or even the floor. The surface must be strong enough to absorb the mallet blows.
- Lay the bearing on the drift and tap the axle fully into the bearing.
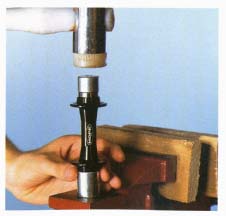
6. Lower the hub down onto the axle . Make sure that the axle is through the middle of the bearing you have already fixed inside the hub.
- Use the drifts to tap the hub down so that the axle goes all the way into the bearing.
- Replace the seals and spacers. Secure the lockrings on to the axle. The grooves on the seals must snap back into place or the seals will not work.