Tools needed:
- 15mm and 16mm cone wrenches (Shimano)
- 13mm and 14mm cone wrenches (Campagnolo)
- Grease
- Grease gun (optional)
- Allen key multi-tool
- Adjustable wrench
- 8mm or 10mm Allen key
Hubs are available, like bottom brackets, in two types -- open-bearing or cartridge. The open-bearing hubs require much more maintenance than the cartridge type, since their bearings need regular inspection, cleaning, and re-greasing. As a result, the ability to strip down and service an open-bearing hub is a skill that can be used repeatedly.
The following steps will help you to remove an axle and a freehub, as well as re-grease and retighten the bearings. They can be applied to a Shimano front or rear hub and a Campagnolo front hub. However, leave servicing a Campagnolo rear hub to the experts at a bike shop because it requires special tools.
Before tackling the steps in this sequence, the cassette or block should be removed.Looking for the latest gear? Visit our new Cycling Gear and Accessories site.
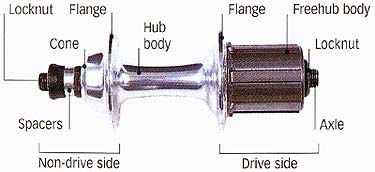
Right: Components of an open bearing
hub.
Locknut, Flange, Freehub body, Non-drive side, spacers, Drive side, Axle
Step-by-step guide to Overhauling an open-bearing hub
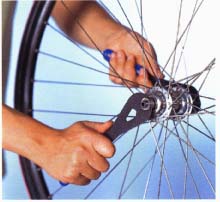
1. Remove the locknut on the drive side with a wrench while holding the non-drive side cone with a cone wrench. Some locknuts can be removed with an ordinary wrench, others with an Allen key.
- Keep holding the non-drive side cone with the cone wrench and remove the drive-side cone with another cone wrench.
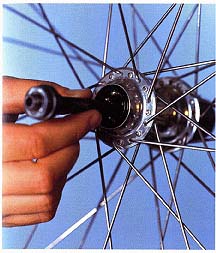
2. Pull the axle out from the non-drive side. Be careful not to dislodge any of the ball bearings as you do so.
- Clean the cones and axle and then inspect them for damage. Check to see if the axle is bent by rolling it on a flat surface and looking for any irregular motion. Replace damaged cones or bent axles immediately.
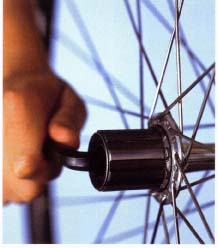
3. Insert an Allen key into the 8mm or 10mm Allen bolt located in the center of the freehub. This bolt holds the freehub body on to the axle.
- Turn the key counterclockwise to remove the freehub. You may need a bit of force to loosen this bolt, so use an Allen key with a long handle for extra leverage.
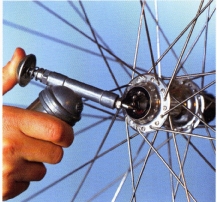
4. Take out all the ball bearings from each side and clean them with degreaser.
- Replace hall hearings that are scored or have flat spots on their surface.
- Insert a layer of grease into each groove, or race, where the ball hearings sit.
- Return the ball hearings to each race, pressing down firmly so the grease holds them in place.
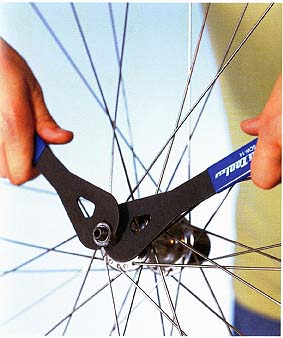
5. Fit the new hub body or the cleaned old one by reversing Step 3 .
- Reinsert the axle from the non-drive side.
- Tighten the drive cone up to the bearings and make sure the axle spins freely with minimal play.
- Lock the cone into position with the locknut.
- Use the cone wrenches to check that the non-drive cone is tight against its locknut.