- Measuring calipers
- Ruler
- Wrench
- Cartridge bottom bracket remover (examples: Bottom Bracket Tool, Bottom Bracket Tool 2, Bottom Bracket lockring tool)
- Grease (example: Shimano bicycle grease)
Cartridge bottom brackets require no routine maintenance. Their bearings are sealed from the elements -- even from the water you use for hosing or pressure-washing your bike, provided you turn the pedals forward during the wash.
When the bearings do eventually wear out, you will have to replace the whole unit. The remover tools for this job are specific to each particular bottom bracket, so check which brand is fitted to your bike before buying the tools.
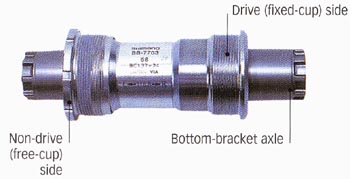
If you are planning a replacement, there are three types of bottom bracket axles to choose from: square-tapered, Shimano Octalink, and Isis. The type used in the steps in this sequence is square-tapered; the type shown below is Octalink. Finally, if your bike is fitted with an Italian-threaded bottom bracket, marked 36 x 1, ask a bike shop to help with replacing it.
Below: Parts of a cartridge bottom bracket:
CLICK HERE to shop for bottom bracket products
Installing a cartridge bottom bracket
1. Put the bike on a workstand and remove the crankset.
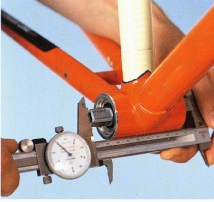
- Use a pair of calipers to measure the length of the old axle before you remove the bottom bracket, so that you can be sure the replacement has an axle of the same length. You need to do this because different cranksets are designed to work with different axle lengths.
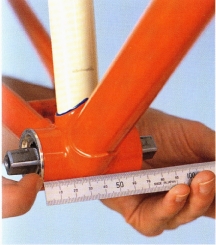
2. Measure the width of the bottom-bracket shell with a ruler. The shell forms part of the bike's frame and will be either 2-3/4 inches (68mm) or 3 inches (73mm) wide. This width determines the width of the bracket unit you need to buy.
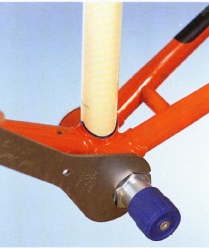
3. Remove both the crankarms (insert a bottom-bracket remover into the non-drive side of the bracket, and turn the remover counterclockwise with a wrench.
- Repeat on the other side, turning clockwise. Turn counterclockwise if your bike has an Italian- threaded bottom bracket (marked 36 x 1).
4. Grease the threads of each side of the new bottom bracket for easier fitting. The non-drive threads are sometimes referred to as the free-cup and the drive-side threads are known as the fixed cup. Do not grease the drive side of a bottom bracket with Italian threads.
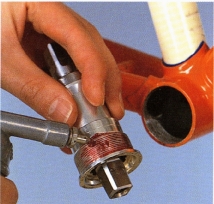
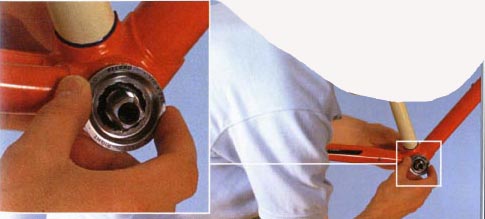
5. Insert the bottom bracket from the drive (fixed-cup) side using the remover tool. Fit the teeth of the tool into the indentations of the bottom bracket (see enlargement).
- Insert the non-drive (free-cup) side when the drive side is almost in position Use the remover to screw it in a few turns. Fully tighten the drive side then the non-drive side.