The following remarks apply to all types of wheels. Read them, then turn to the instructions which follow for the different types of wheels.
If the wheel which you are installing is not the original one, also read the section on exchanging wheels, be low. There are several fine points which you must check to be sure that the new wheel will fit the bicycle.
Before installing a wheel, spin the axle and note whether either end is oft-center, indicating that it’s bent. A bent axle won’t center the wheel properly. Check that the hub bearings turn freely but without excessive sideplay. As described in the sections on hubs, sealed-bearing and quick-release hubs should be adjusted looser than conventional nutted hubs.
Use a hub-cone wrench and adjustable wrench to check that the hub-cone locknuts are securely tightened against the cones. A loose right cone will tighten into the hub, damaging the bearings. Some Raleigh and Schwinn front hubs don’t have locknuts. If there is only one set of wrench flats on each side of the hub, don’t put one wrench on either side, tighten the two cones toward each other, and smash the bearings!
Make sure that the tire will clear the shoes of a rim brake; if necessary, open the brake quick release, remove one brake shoe, or deflate the tire.
After installing the wheel, check that it centers correctly in the frame and between the brake shoes. If the brake is off-center so it drags, adjust it as described in Section 16. If the wheel is off-center in the frame, either the wheel or the frame is out of alignment; instructions for correcting this problem are in Section 17 (wheel) and Section 18 (frame).
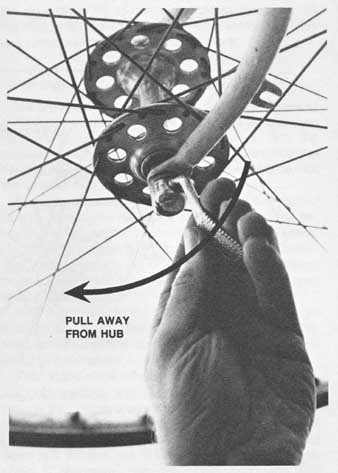
To loosen a quick-release wheel, pull the lever away from the hub as
shown. It’s not a wingnut.
Installing a Front Wheel
Guide the axle into the front-fork dropout slots, with the cone lockwasher on the right side (sprocket side) of the fork, until the axle is seated against the ends of the slots.
If heavy washers are used against the fork, make sure these are at the outside, under the axle nuts. If the bicycle has fender braces or accessory supports to be clamped under the axle nuts, then you will have to replace axle washers and nuts after installing the wheel. Slide all parts onto the axle, making sure there is a washer on the outside of the fork blade and directly under the nut. Oil the axle threads so the nuts won’t Strip.
Lower the bicycle onto the wheel, making sure that the axle washers are at the outside of the fork blades. Then tighten the axle nuts or quick-release assembly. If the wheel has a drum brake, follow the further instructions in the non-derailleur rear wheel part of this section.
Tighten a quick-release by rotating the cam lever through 180 degrees at right angles to the wheel until it’s parallel with the fork blade. Reach your hand around the fork blade so you can push the quick-release lever harder. It should take most of the strength of your hand to push it down. If it won’t go down all the way or if it goes down too easily, advance or back off the adjusting nut on the opposite side of the wheel.
CAUTION: The quick-release assembly is a pres sure clamp, not a wingnut. If you try to screw it down like a wingnut, you will never get it tight enough, and the wheel is likely to come off.
The clamping action of the quick-release assembly compresses the axle and tightens the bearing adjustment. Unless you have checked the bearing adjustment before, test it now as described.
== ==
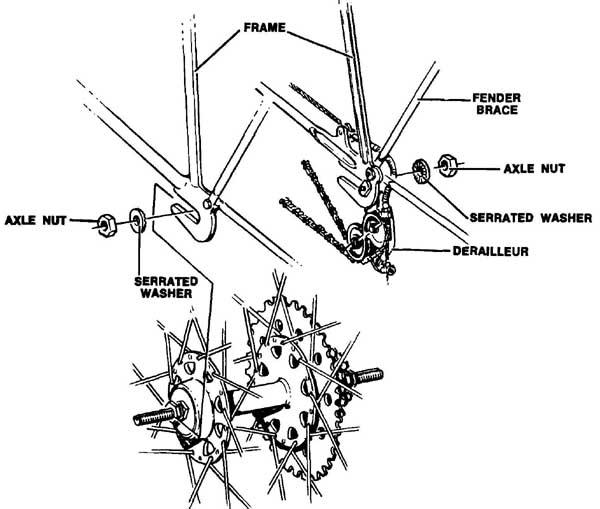
This illustration shows the arrangement of the washers and locknuts
used to attach a nutted fixed or freewheel rear hub to the frame. FENDER BRACE;
NUT; WASHER; AXLE NUT; QUICK RELEASE LEVER
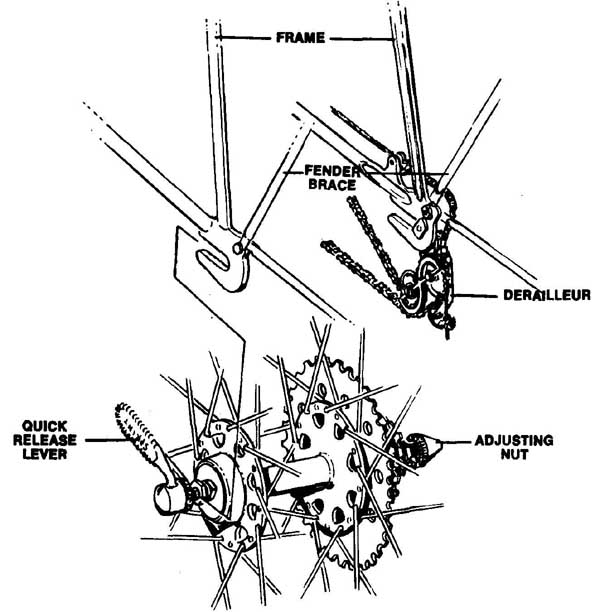
The quick-release rear hub is easily removed without using tools,
by pulling the lever away from the frame.
== ==

Arrangement of washers, nuts, cable, and brake-arm strap of a Sturmey-Archer
S3C hub, typical of non-derailleur rear hubs. All coaster-brake and drum-brake
hubs use a brake arm, and all multispeed hubs use a shift-control cable or
cables.
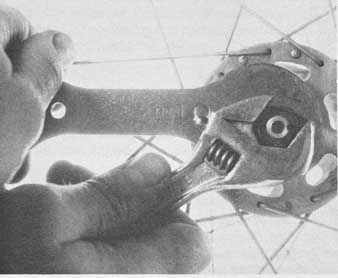
Check the tightness of the locknuts before installing a wheel.
== ==
A conventional nutted hub with cone locknuts won’t need bearing adjustment after installation. Some British and Schwinn front hubs don’t have cone locknuts. Only one bearing cone of these hubs is adjustable. It must be on the left, so it cannot tighten into the bearing.
Loosen the left (flatted) cone of the British hub and tighten the right cone until it runs up against its shoulder on the axle and will turn no more. Then install the wheel, with the flatted cone on the left. Tighten the right axle nut, then adjust the left cone and tighten the left axle nut. Tightening the axle nut changes the bearing adjustment slightly, so recheck and readjust as necessary. General instructions on adjusting bearings are in Section 8.
The Schwinn hub has a cone lockwasher, shown in the exploded drawing in this section. This lockwasher goes on the right, locking the right cone to the fork. Adjust the left cone as with the British hub.
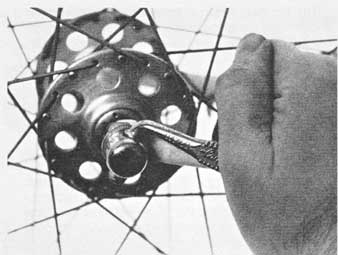
To tighten a quick-release front hub, press the lever down toward the
frame. You may hook your fingers over the fork blade for extra force. If it’s
too easy or too hard to press home, loosen the lever, then turn the adjusting
nut on the opposite side a fraction of a turn while holding the lever.
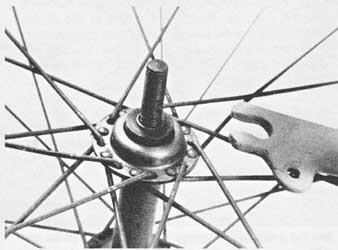
The flanged Raleigh front-hub cones must be used with a recessed Raleigh
fork.
Finish by tightening a rim-brake quick release, replacing a brake shoe, or inflating the tire. Make sure that the wheel turns smoothly and the brake works properly before riding the bicycle.
Installing a Rear Wheel—Derailleur Type
Unless fender or rack braces are mounted under the axle nuts, replace all axle hardware loosely before reinstalling the wheel. Refer to the exploded drawings in this section. Oil axle threads to keep axle nuts from stripping.
Adjust the rear derailleur to its outermost (high-gear) position. Stand at the left side of the rear of the bicycle as you did to remove the wheel. Hold the wheel in your right hand, by the rim, with the sprockets facing away from you.
Lift the bicycle and place the upper part of the wheel between the rear forks. Transfer your right hand to the rear derailleur and pull it toward the back of the bicycle. Lower the bicycle and tilt it toward you so the upper chain engages the top of the smallest rear sprocket. Lower the bicycle onto the wheel, guiding the hub axle to the front of the forkend slots, If the wheel has a nutted axle; make sure that the axle washer on each side is outside the slot. If it’s not, lift the bicycle slightly and adjust the washer’s position.
If the derailleur is mounted to the forkend with a separate hanger as shown, or if the forkend slots are vertical, push the axle all the way into the right slot. If the hanger is a built-in part of the right forkend, place the axle about halfway back in the slot; the best position depends on the type of rear derailleur and the size of the sprockets. Many bicycles with built-in hangers have threaded adjusting screws to position the rear wheel.
At this time, tighten the right axle nut of a nutted hub, but don’t tighten a quick release yet.
If the wheel is equipped with a drum brake, now attach the brake-arm assembly loosely to the left chainstay, as described in more detail in the later part of this section on non-derailleur rear wheels.
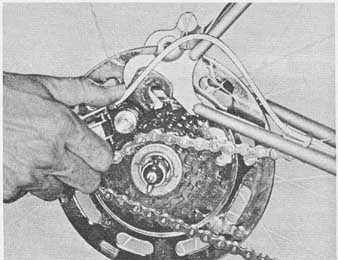
Pull the rear derailleur rearward, slip the rear wheel in, and en gage
the upper chain on the smallest rear sprocket to position the wheel for reinstallation.
Next, kneel at the left side of the bicycle. Hold it upright with your left shoulder. Unless the bicycle has wheel-position adjusting screws or vertical forkend slots, hold the front of the wheel centered by wedging your left thumb and index finger between the wheel and the chainstay on either side. Then tighten the quick release or the left axle nut.
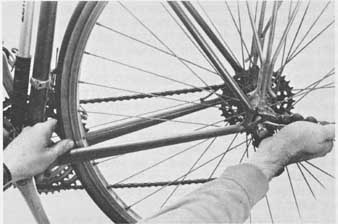
Hold the rear wheel centered between the chainstays while tightening
the quick-release lever or rear axle nut.
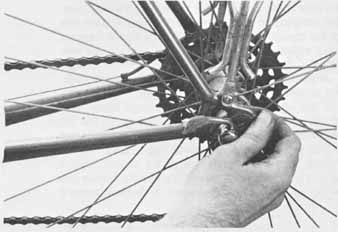
Rear-wheel axle-adjustment screws let you center the wheel once; it
will automatically settle in the correct position from then on.
Tighten a quick release by rotating the cam lever through 180 degrees at right angles to the wheel until it faces the rear of the bicycle. Reach your hands around the spokes so you can push the quick-release lever harder. It should take most of the strength of your hand to push it down. If it won’t go down all the way or if it slips into place too easily, advance or back off the adjusting nut on the opposite side of the wheel.
CAUTION: The quick-release assembly is a pres sure clamp, not a wingnut. If you try to screw it down like a wingnut, you will never get it tight enough, and the wheel is likely to come off.
The clamping action of the quick-release assembly compresses the axle and tightens the bearing adjustment. Unless you have checked the bearing adjustment before, test it now as described later. A conventional nutted hub with cone locknuts won’t need a bearing adjustment after installation.
If the wheel is equipped with a drum brake, now tighten the bolt that holds the brake-arm strap to the left chainstay and reattach the cable according to the instructions in the part of this section on non-derailleur rear wheels.
Finish by tightening a rim-brake quick release, replacing a brake shoe, or inflating the tire. Before the bicycle is ridden, check that the wheel turns freely, the brake works properly, and the bicycle shifts properly through all the gears.
Replacing a Rear Wheel—Non-derailleur Type
Unless fender or rack braces are mounted over the ends of the axle, mount all axle washers and nuts loosely before installing the wheel. The exact hardware used will vary with the make and type of hub. If you have lost track of the position of the nuts and washers, check the exploded drawings in the sections on rebuilding each type of hub. Oil the axle threads to prevent the nuts from stripping.
Coaster-brake or geared rear hubs use special hard ware to resist forces which try to turn them in the frame.
The axle gear of a geared hub tries to turn the axle. Special non-turn washers inside the forkend slots pre vent the axle from turning, while still leaving room for the normal washers under the nuts at the outside. Sturmey-Archer hubs use a non-turn washer at either end of the axle, as shown in the exploded drawing in this section. Shimano hubs use only one such washer; see the exploded drawings in the hub section for de tails.
When a coaster or drum brake is applied, a brake arm, strapped to the frame, resists the powerful braking force. A hub with gears and a brake needs non-turn washers and a brake arm. Since the angle of the brake arm is adjustable, the brake arm does not prevent the axle from turning.
When installing the wheel, engage the chain over the sprocket teeth, then slide the axle back into the forkend slots, with the non-turn washer tabs indexing with the slots at the inside. The chain should tighten, stopping the wheel from moving farther back. If the non-turn washers are not completely inside the front of the slots, or if the axle is all the way back and the chain is still loose, you must add or remove chain links. This may be necessary if you have installed a larger or smaller sprocket.
If the wheel is equipped with a drum brake or coaster brake, now attach the brake-arm assembly loosely to the left chainstay. If the brake-arm strap has several mounting holes, bend the strap around the chainstay so as to bring the brake arm as close to the frame as possible.
Tighten the right axle nut partway with the wrench, so it can still slip in the slot. Then turn the crank. With a coaster-brake or fixed-gear hub, lift the rear wheel and turn the crank forward. You can freewheel other hubs backward. Since no chainwheels or sprockets are perfectly round, their high spots will tighten the chain and pull the rear axle slightly forward in the forkend slots.
Turn the crank until the chain is at its tightest, then tap on the middle of the lower chain with the wrench handle to pull the axle forward slightly. Turn the crank again to see that the chain never becomes completely tight. It should never bind, or vibrate like the string of a musical instrument. At its tightest, it should have about ¾ inch of total vertical play. When you are satisfied with the chain adjustment, tighten the right axle nut.
CAUTION: It the chain is too tight, it will pull on the hub and crank assemblies and damage the bearings. If the chain is too loose, it could tall off, disabling a coaster brake and the drive.
Next, kneel at the left side of the bicycle. Hold the front of the wheel centered by wedging your left thumb and index finger between the wheel and the chainstay on either side. Then, holding the wrench in your right hand, tighten the left axle nut.
Recheck the chain adjustment. If centering the wheel has affected it, loosen the right axle nut, readjust the chain, retighten the nut, then loosen the left axle nut, re-center the wheel, and retighten.
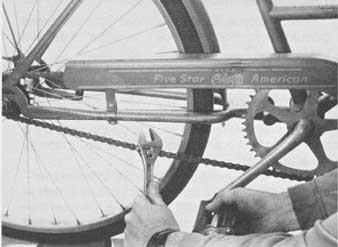
To adjust the slack of a non-derailleur chain, tighten the right axle
nut lightly, turn the crank, and tap on the lower chain with the wrench.
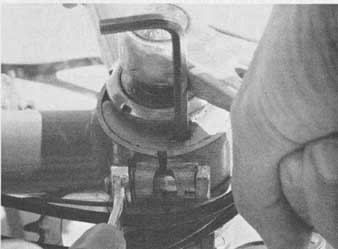
Adjustment of the synchronizing chain of a tandem is similar to adjustment
of a non-derailleur drive chain. Loosen the eccentric bottom bracket with a
wrench and change its position by levering it with an Allen wrench or similar
tool, pushed by the crank.
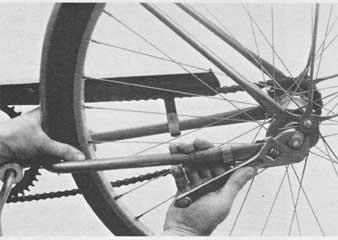
After adjusting the chain slack and tightening the right axle
nut, center the rear wheel with your left hand and tighten the axle nut with
your right hand.
Now, if the wheel is equipped with a drum brake or coaster brake, tighten the bolt which clamps the brake arm to the frame.
CAUTION: The brake arm must already be in its final position. The clamp bolt must not force it into position, or it could bend the rear axle and cause the hub bearings to bind.
Reattach any cables. Instructions for adjusting shifter cables begin in Section 14. After reconnecting a drum-brake cable, check the brake adjustment. The brake lever should have as little wasted motion as possible without making the brake drag. Test that the brake cable won’t slip by grasping the brake lever tightly with both hands.
Finish by tightening a rim-brake quick release, replacing a brake shoe, or inflating the tire. Test that the wheel turns smoothly, the brake works properly, and the hub shifts properly through all gears before riding the bicycle.
Exchanging Wheels
It’s simplest to reinstall a wheel on the bicycle for which it was originally intended. Hub width and other dimensions differ from one wheel to another. Problems in exchanging wheels are most common with lower- priced equipment. High-quality equipment is fairly well standardized, except for tire dimensions and rear-hub widths.
CAUTION: Never force a frame to accept a hub of the wrong width. To adapt hub width, axle spacers must be added or removed, or else the frame must be carefully re-bent so the forkends are parallel. Instructions are in the sections on hubs and on the frame.
To compare tires and rims, refer to the ISO (International Standards Organization) system of rim and tire measurement. This uses numbers like 37-622; the first number is the tire or rim width and the second is the inside diameter of the tire in millimeters. The common 27-inch (630mm) size, of British origin, is slightly larger than the French 700C (622mm) size. Either will fit most adult bicycles. A slightly larger rim often improves the performance of caliper brakes by increasing their leverage.
It may be necessary to file the forkend slots to accept a thicker axle. To avoid wheel-centering problems, don’t file the upper surfaces of the slots, where the weight of the bicycle and rider rest on the axle.
Chainline may vary from one rear hub or freewheel to another. On a single-sprocket system, check that the chain runs straight. On a derailleur-geared system, readjust the rear derailleur as necessary so that it reaches the inner and outer sprockets without jumping beyond them. A different rear derailleur may be needed if the sprockets on the new wheel are much larger or smaller.
CAUTION: Always check rear derailleur travel when installing a different rear wheel. Failure to do this may result in damage or an accident the first time the bicycle is ridden.
Many hubs have one type or another of retention device to keep a loose wheel from falling off. Flanged Raleigh front-hub cones or nuts can be used only with a recessed Raleigh forkend, unless a 3/8-inch washer is used to cover the flange. Other retention devices can usually be removed if the matching part is not on the frame. Just be sure that you, and the rider of the bicycle, know how to tighten the axle nuts or quick release securely.