Cable brakes
Brakes should be serviced frequently. On cable-brake bicycles, begin by inspecting pads for wear and shoes for proper clearances (see Servicing brake shoes, this page.) Check wheel rims for distortion or damage. Replace cables that are frayed, kinked, or cut. Next, squeeze the brake levers. If they hit the handle bar, adjust them (see below for side-pull brakes; facing page for center-pull). This may require a helper. Oil cable housings every two months.
Servicing brake shoes
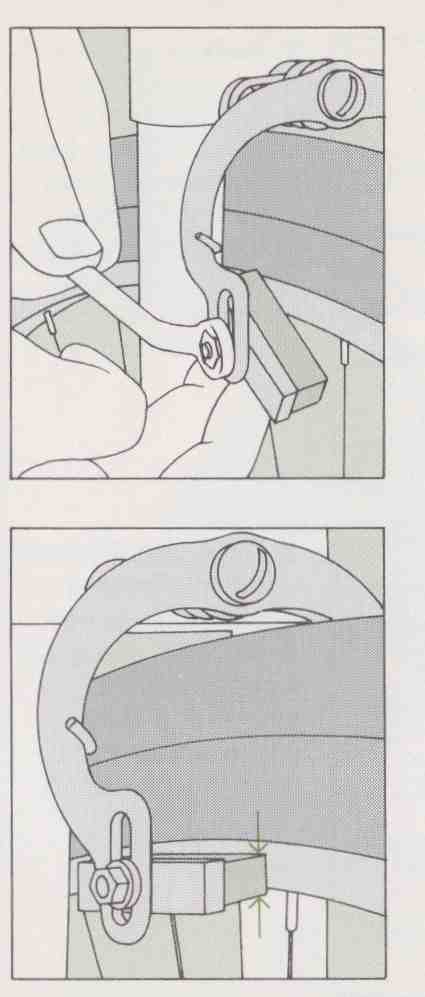
1. Loosen nut holding shoe to brake arm. If pads are worn, remove shoes and replace with shorter-lived but better gripping red racing pads. Always install new pads in pairs.
2. Adjust shoe height so that entire pad surface closes on wheel rim without touching tire. Then, tighten nut. It shoes have an open end, make sure it faces the back of the bicycle.
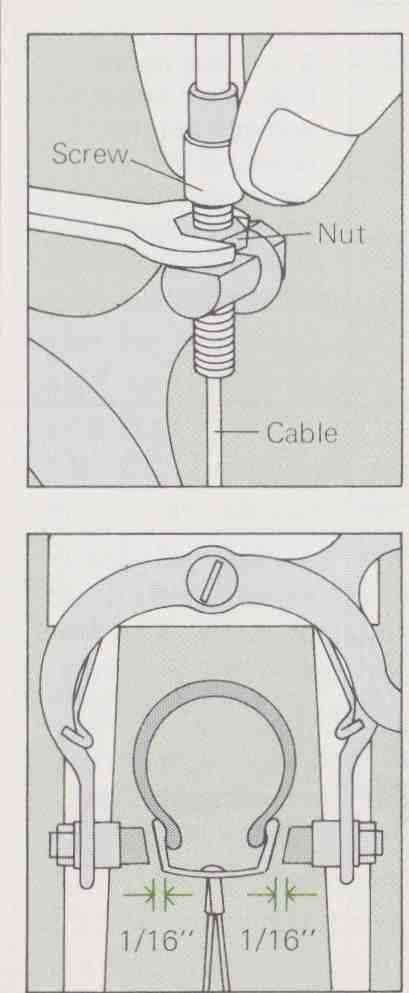
3. Make sure that handbrake lever is in the fully open position. Regulate distance of pads to wheel rim by first loosening adjuster screw locknut with a wrench, and then turning screw.
4. Pads are correctly set when they clear wheel rim by 1/16 in. on each side. Tighten adjuster screw locknut after the pads have been properly set.
Replacing brake cables
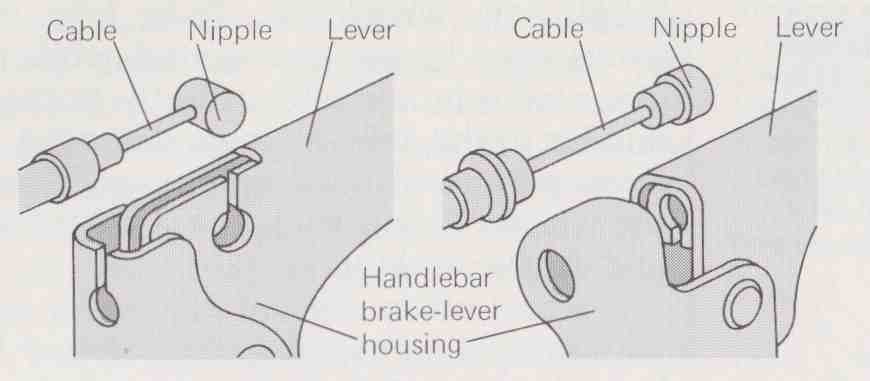
To replace a faulty brake cable, open the anchor bolt at the wheel and pull cable out of adjuster (see diagrams on this and facing pages). Pull the cable casing out of the brake lever housing on handlebar and push the cable to disengage nipple. Two types are shown disengaged here.
Attach new nipple and casing. Slip end of casing into adjuster at wheel, and fit free end of cable through hole in anchor bolt. Pull cable taut, tighten bolt, adjust brake.
Adjusting side-pull brakes
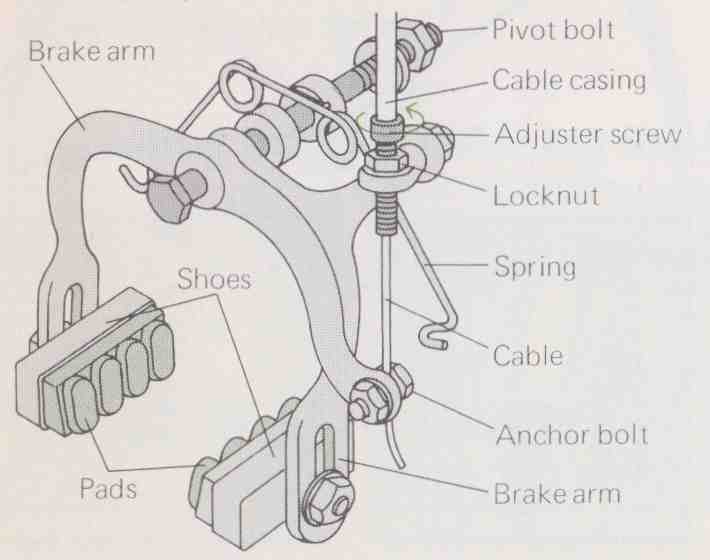
1. If brake lever hits handlebar, loosen locknut on brake assembly at the wheel and turn adjuster screw by hand. When lever clears bar, retighten the locknut.
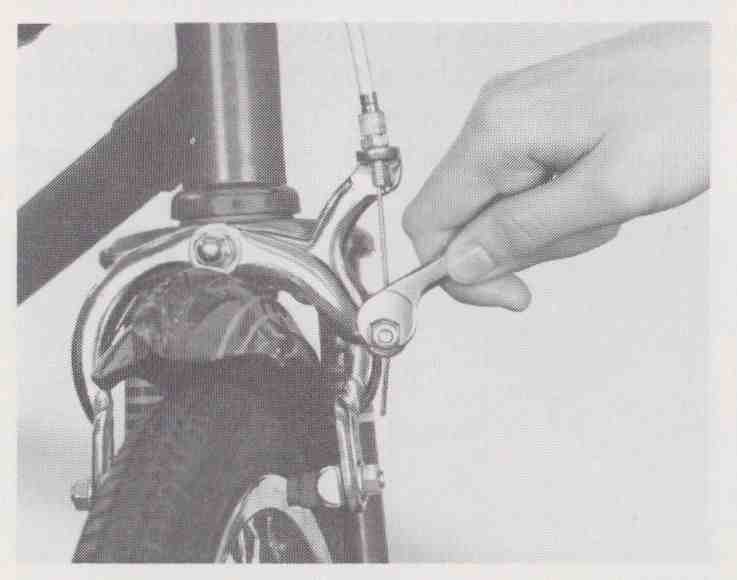
2. It brake shoes are still more than 1/8 in. from wheel rim after lever has been adjusted, the cable has gone slack. Loosen the cable anchor bolt.
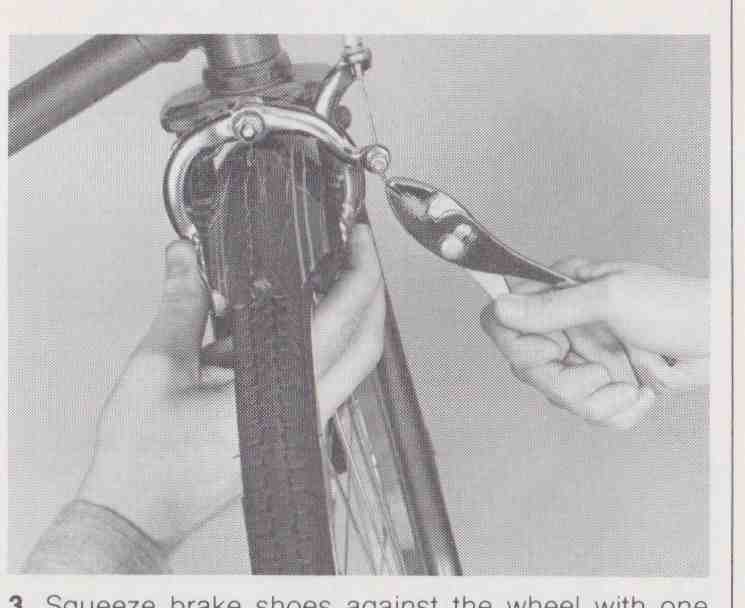
3. Squeeze brake shoes against the wheel with one hand. Using pliers, grasp the free lower end of the cable and pull it downwards to take up the slack.
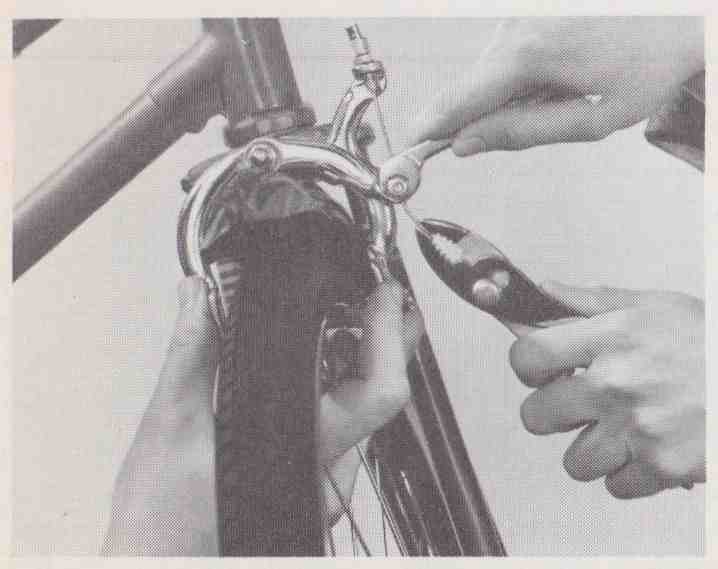
4. Hold the cable taut and maintain pressure on the brake shoes. Have a helper tighten the cable anchor bolt. Release cable and brakes,
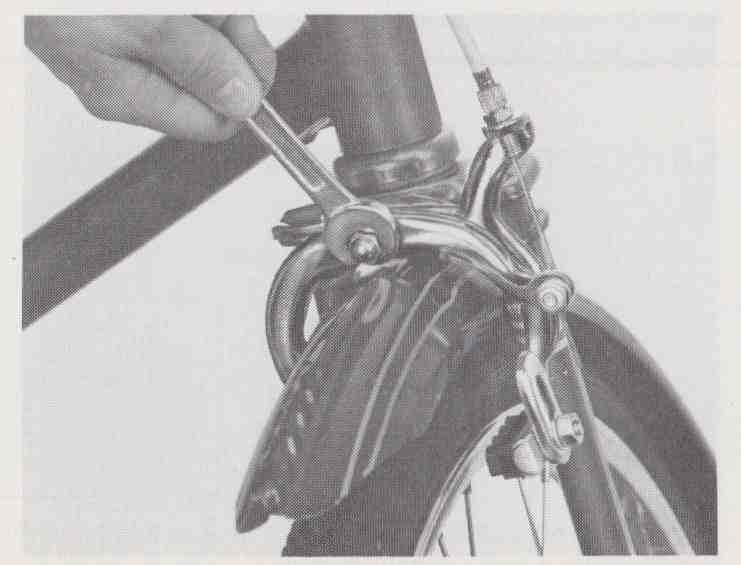
5. If brake shoes remain in the closed position, loosen the center pivot bolt until the pads come free from the rim, but not so much that they wobble.
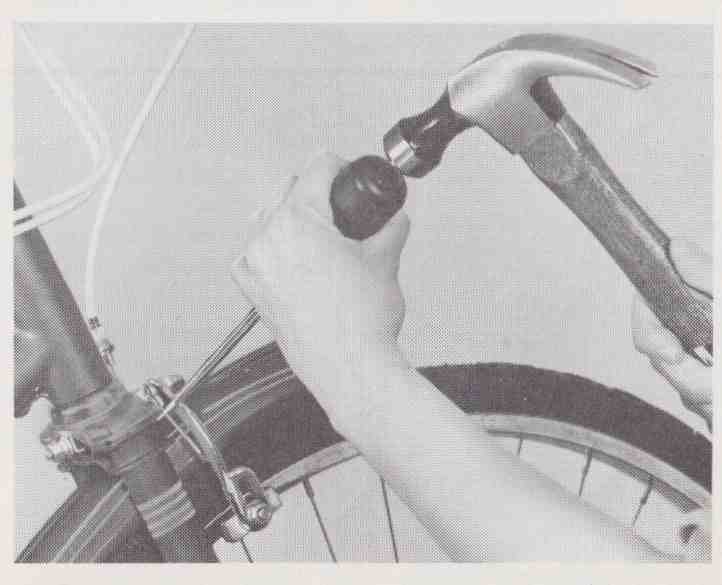
6. Check to see that the wheel is centered between the shoes. If it is not, lightly tap spring on arm farthest from the rim until unit is centered around wheel
Adjusting center-pull brakes
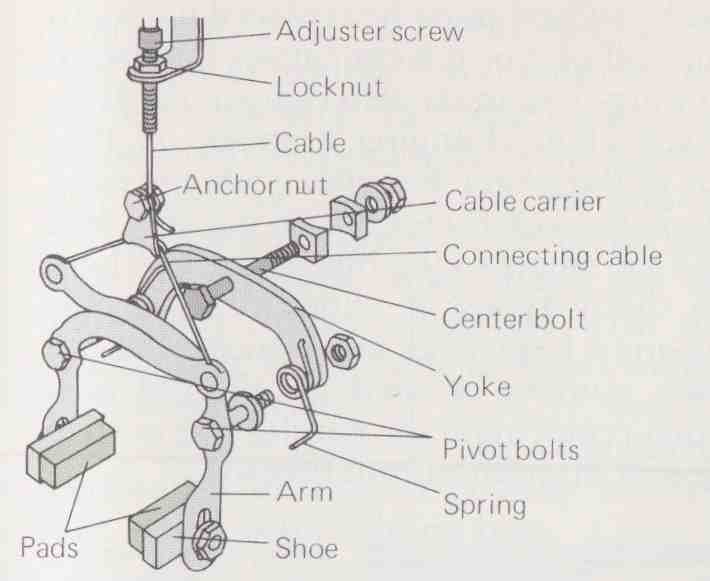
1. To adjust lever, loosen locknut and turn adjuster with your fingers. Then, retighten locknut.
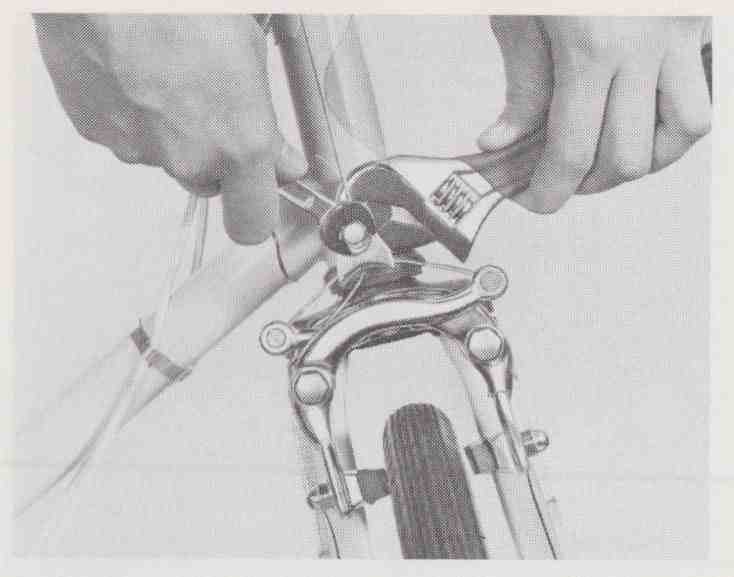
2. To take up slack in the cable, loosen the anchor nut on the cable carrier, above the brake arms.
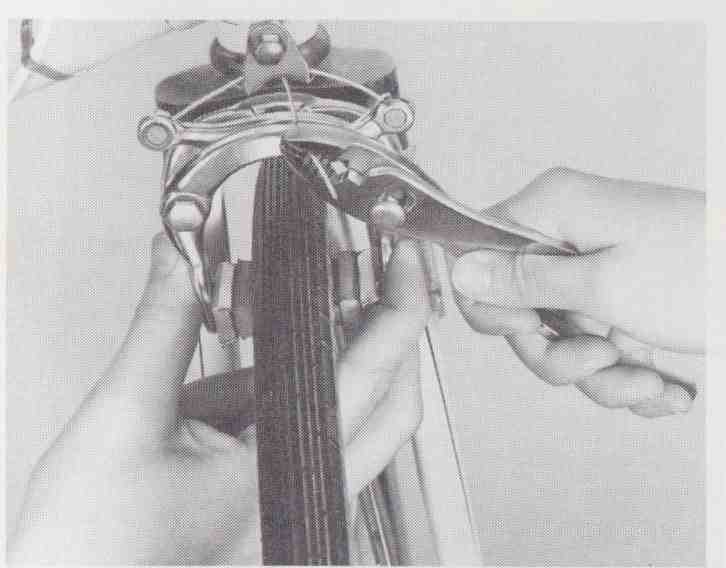
3. Have a helper press brake shoes tightly onto wheel rim while you grasp cable end with pliers.
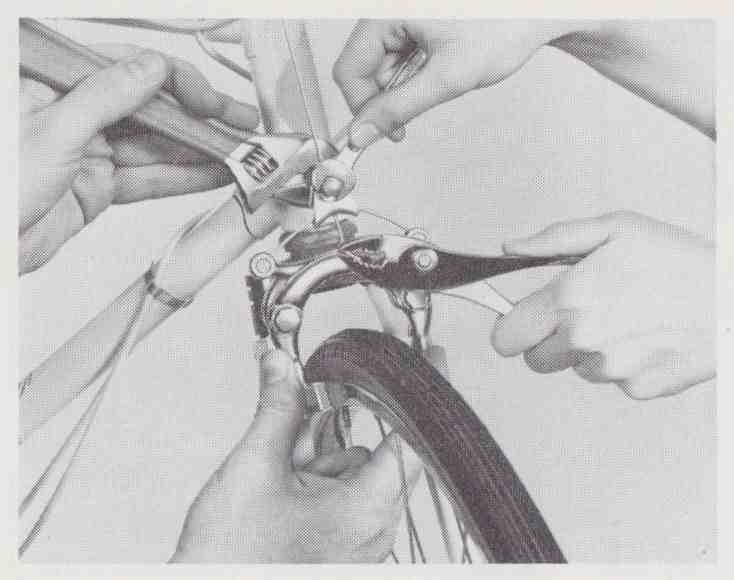
4. Pull cable downward until it is taut. Keep pressure on cable and shoes and tighten anchor nut.
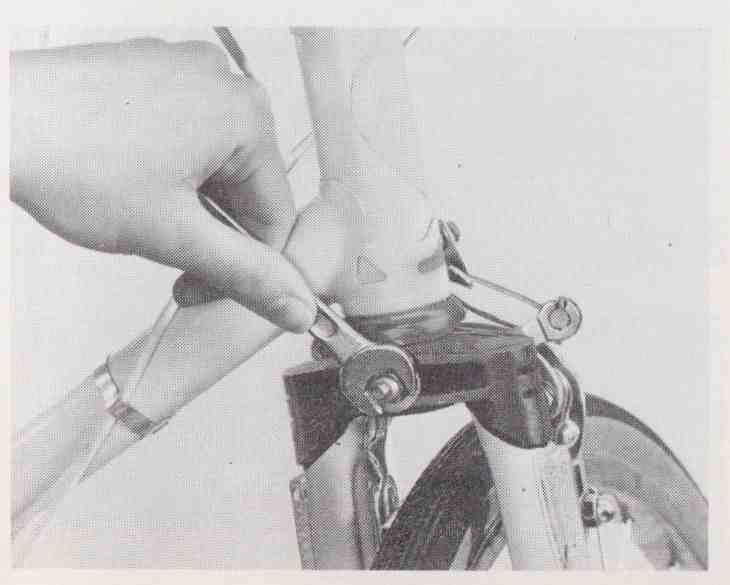
5. If brake shoes are not equidistant from wheel, loosen brake holding nut (behind fork or bracket).

6. Move brake yoke by hand until brake pads are centered on rim. Retighten nut.
Adjusting coaster brakes
A coaster brake is located inside the rear hub and activated by backpedaling. It is most commonly used on single-speed bicycles. Designed and built for durability, it requires no preventative maintenance other than oiling. Eventually, its bearings and cones will wear with use. The coaster brake may look simple, but it is not. Have any internal work done by a qualified repairman.
You cart adjust the brake yourself if the rear wheel begins to wobble or bind. These problems will occur if the retaining clip breaks, allowing the brake lever to rotate, or if you accidentally turn the brake lever when changing wheels on your bicycle.
Adjust the brake so that the wheel spins freely, yet has no side-to-side play.
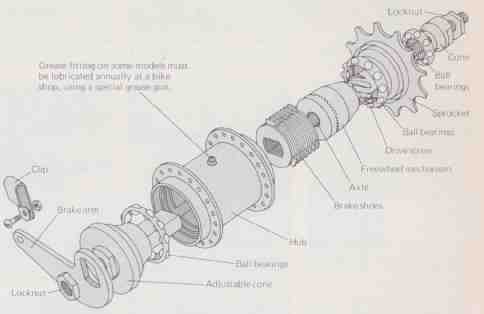

above: (L-R) steps here:
1. Dismount the wheel. Clamp the wheel in a vise that has been lined with wood or copper to protect the soft threads of the axle
2. With wrench or channel pliers, loosen locknut next to coaster brake arm. Take care not to strip the threads by applying too much force.
3. To tighten hub, turn brake arm clockwise until wheel no longer wobbles. It should spin smoothly and freely with no notice able binding or drag.
4. Holding brake arm in position, tighten locknut. Mount wheel on bicycle and secure brake arm with clip. Test brakes, on a level surface.