Tools needed:
- Allen key multi-tool
- Degreasers
- Grease
To determine whether your bike is equipped with a threadless or a threaded headset, look at the stem. If you can see bolts on the side of the part that sits on top of the head tube, it is a thread less headset.
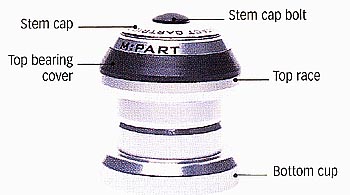
A number of different types of threadless headsets can be fitted to modern bikes. These range from the type that has both top and bottom cups, like the traditional headset, to others, such as the headset illustrated here, where the bearing surfaces fit inside the head tube. All the various types of headsets work on the same principle and are taken apart in a similar way.
Occasionally, you need to strip down the headset in order to check it for wear and to clean and lubricate the bearings. If you find any cups or bearing surfaces are worn, you will need to replace the whole headset. This job requires special equipment and is best left to the experts in a good bike shop.
Right: Parts of a threadless headset.
Step-by-step guide to Adjusting and cleaning a threadless headset
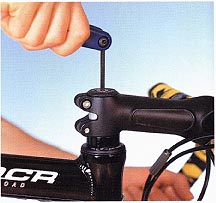
1. Remove the stem cap bolt from the center of the stem cap with an Allen key. This bolt loads the headset to prevent play in it, rather than securing the stem.
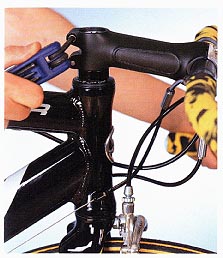
2. Loosen the clamp bolts on the side of the stem once you have removed the cap bolt. The stem and handlebar assembly are now free. It is the stem clamp bolts that secure the stem to the steerer.
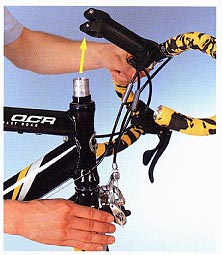
3. Take hold of the front fork , then lift the stem and handlebar from the steerer. You can leave these to hang out of the way, supported by he brake and gear cables.
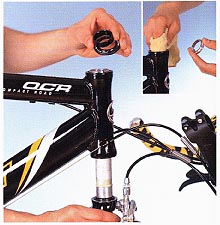
4. Lower the fork and lift off the top spacers and either the top cup or bearing cover, depending on the type of threadless headset.
- Clean, degrease, and look at the bottom bearing. If there are no signs of wear, grease the bearing.
- Take the centering wedge out of the head tube. Clean the bearings, bearing surfaces (inset), and bearing cover or top cup . Examine for wear, put new grease on the bearings, and reinstall.
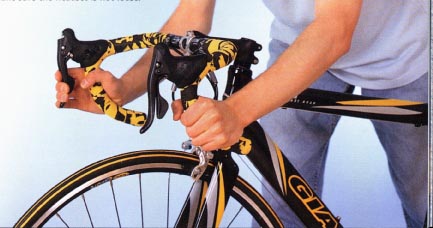
5. Put the fork back into the head tube and replace the centering wedge bearing cover, and spacers.
- Put the handlebar and stem back on top of the steerer.
- Load the headset by tightening the stem cap bolt to a point where the handlebar turns freely but there is no play in the headset. Secure the stem in place by tightening the clamp bolts.
- Apply the front brake and try to push the bike forward to make sure the headset is not loose.