- Crankarm extractor (or this puller)
- 5mm Allen key
- 8mm Allen key or crankset socket wrench
- Chainring bolt peg wrench
Removing a crankset is a useful skill to have because it will allow you to replace an old crankarm, clean or replace a worn chainring, or work on the bottom bracket.
Some cranksets are held in place by a hexagonal bolt, which can be removed with a crankset socket wrench (see Step 1). Other cranksets are equipped with self-removing Allen bolts, which can be detached with an 8mm Allen key (see Step 2).
When refitting a crankset, keep grease or oil from touching the axle. The crankset must be dry when fitted to the axle or it will work loose. After refitting, go for a short ride and then try the axle bolt again. If it is slightly loose, you should tighten it.
Step 5 shows how to remove a chainring so that you can replace one that is worn, or fit a bigger or smaller chainring that will provide you with different gear ratios.
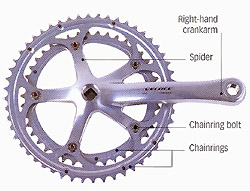
Below: Parts of a crankset.
CLICK HERE to shop for crankset products
Removing a crankset
1. Detach a hexagonal crankset bolt from the axle with a crankset socket wrench.
- Normal socket wrenches are often too thick to fit into the space where the bolt is located.
- Steady the crankarm with your free hand to give you something to push against. Work from below the crankset so that if your hand slips, the chainring teeth will not injure you.
- To remove the crankset, go to Step 4.
.
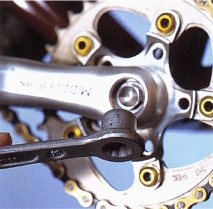
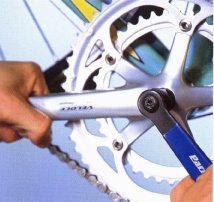
2. Unscrew a self-removing Allen bolt with an 8mm Allen key. These bolts extract the crankset as you unscrew them.
- Steady the era nkarm with your free hand to give you something to push against. Work from below the crankset so that if your hand slips, the chainring teeth will not injure you.
- To remove the chainring, go to Step 5.
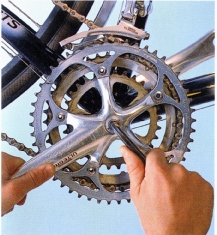
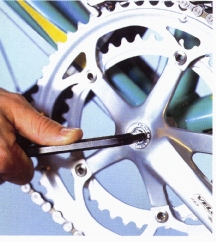
3. Use a long-handled Allen key if there is an Allen bolt holding the crankset on your bike. Usually, an 8mm key is the size required.
- Work from below the crankset so that if you slip, the chainring teeth will not injure you.
- To remove the crankset, go to Step 4.
4. Use a crankarm extractor to remove the crankset if it is not the self-removing type.
- Make sure that the washer beneath the bolt has also been removed.
- Carefully screw the extractor into the delicate threads at the center of the crankset. When the extractor is fully in, turn its handle clockwise to pull off the crankset.
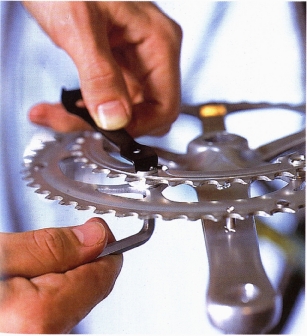
5. Remove the chainring with a 5mm Allen key on one side and a chainring bolt peg wrench to hold the bolt on the other. You can do this without taking the crankset off the axle, but you must remove it if you are working on the inner rings of some triple cranksets.
- Cure a creaking noise from the crankset by putting grease on the threads of the chainring bolts before you reassemble the crankset. Standard chainring bolts are made from steel. Be especially careful not to over-tighten aluminum or titanium bolts.