- Wrenches
- Cassette remover
- Chain whip
- Block remover
- Grease
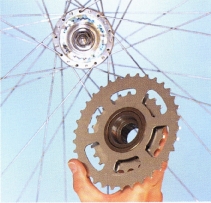
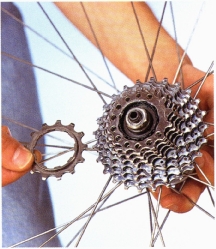
The cassette and freewheel allow the rear wheel to rotate while the pedals remain stationary. Their internal mechanisms -- the freehub body of a cassette and the block in a freewheel -- will eventually wear out and need replacing. The cogs on both can also wear down. These parts will also need to be removed whenever you replace a broken spoke on the drive side of the rear wheel.
The tools for removing a freewheel and a cassette depend on the manufacturer of the part that is fitted to the bike. Usually, the manufacturer’s name is stamped on the component. However, if you are in any doubt about which tool you need, take the wheel to the bike shop when buying a remover tool.
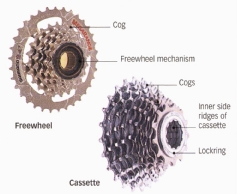
Right: Parts of a freewheel and a cassette.
CLICK HERE to shop for cassette and freewheel products.
CLICK HERE to shop for freehubs/rear hubs.
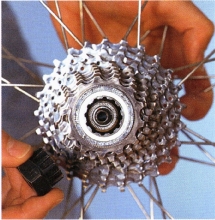
Removing a cassette
1. Remove the quick-release skewer from the rear wheel.
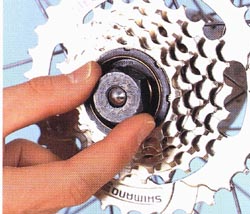
- Insert the cassette remover into the teeth of the lockring at the center of the cassette.
- Replace the quick-release skewer to secure the cassette remover.
.
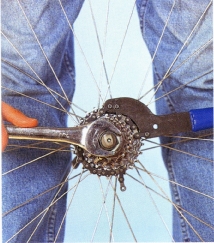
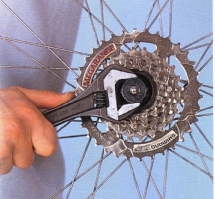
2. Wrap the chain whip around a cog, and place the wrench on the remover.
- Press downward on both tools. This holds the cassette, while the remover unlocks the lockring.
- Remove the quick-release skewer once the lockring starts turning.
- Continue to unscrew the lockring with the cassette remover.
3. Take off the smallest cog after you have removed the lockring. On many cassettes, the remaining cogs come off in one piece. If they do not, you must put individual cogs back in a certain way. Failure to do so will affect the precision of gear-shifts. Usually, the cogs are marked, so that lining up these marks ensures the correct cog orientation.
Removing a freewheel block
1. Remove the quick-release skewer and insert the block remover into the teeth at the block’s center.
- Lock the block remover in place by replacing the quick-release skewer.
2. Put the wrench on the flats of the block remover and turn counterclockwise.
- As the block begins to move, remove the quick-release skewer and continue turning until the block comes off.
3. Check the integral freewheel mechanism, which is independent of the hub. Replace it with a new block if it is worn.
- Coat the threads of the hub with grease, then screw the block on by hand.
- Lock the block in place by tightening it with the wrench and the block remover.